-
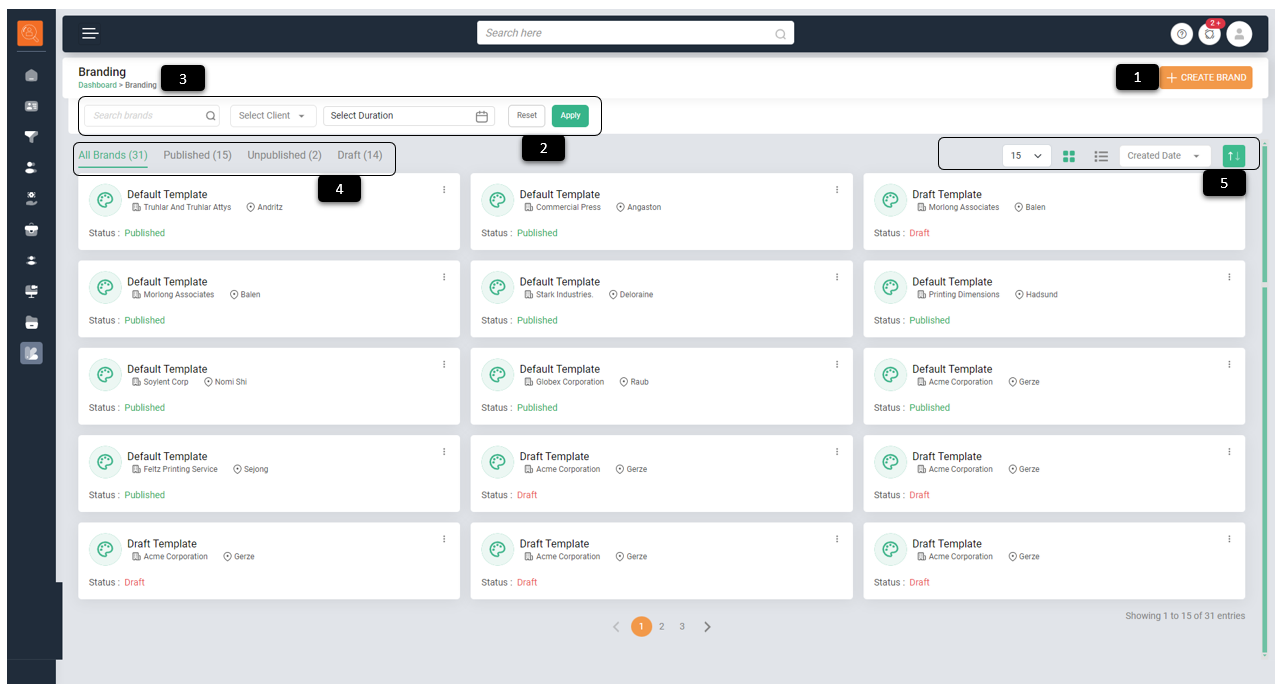
1 Create Brand - Click on this icon to create Brand Page of clients.
-
2 Filter/Search Bar - To filter page content as per various parameters e.g. "Brand Name ", "Client Wise " and "Date". Click on "Reset" for default view and "Apply" to make filter applicable.
-
3 Navigation Icons - Use this to navigate to pages (it will take one to the page highlighted in green e.g. Dashboard).
-
4 Branding Sub Tabs - These are quick view options to view Contents as "All Brands", "Published", "Unpublished" and "Draft".
-
5 View & Sort Options - For ease of viewing such as number of Items to be displayed per page, whether in list or card form. One can also sort items basis "Name", "Created Date", "Last Modified", "Client" and "Location".
How to create a brand page?
-
1 Click on "Create brand", set up your brand page window will open.
-
2 Click on "My Client", a list of clients with accounts will reflect. Scroll down the list and select the client for which you want to create the brand page.
-
3 Click on "Next" fill "About Us" details i.e. Client's organisation details such as history, sector they are qorking in etc.
-
4 Click on "Next" fill "CEO Message"
-
5 Click on "Next" a new window will open with various elements which can be added or deleted or formatted as required i.e. Logo , Interview details, Brand video, About Us, CEO Message, Social Media handle links.
-
6 Click on "Publish" to release the brand page or "Save" as drafts to be used later or "Cancel" if you want to discard the page created.
Once published you can go to brand tab to either "Preview" or "Edit", "Delete" or "Unpublish" a published brand page. -
7 Click on "Icons next to Preview" to see how the page will look on desktop/tabular devices or handheld devices
-
8 Click on "Plus i.e. Add to Page" fillbutton to add elements such as "logo", "Videos", "Buttons", "Social" and "Text" segments to the brand page.
-
9 Click on "Organization Info" to add links to various media handles. Website link is directly added from the website given during creation of account.
-
10 Click on "Media" to add links to add logos and videos.
-
11 Click on "Page Layers" to change the order of the various segments.