-
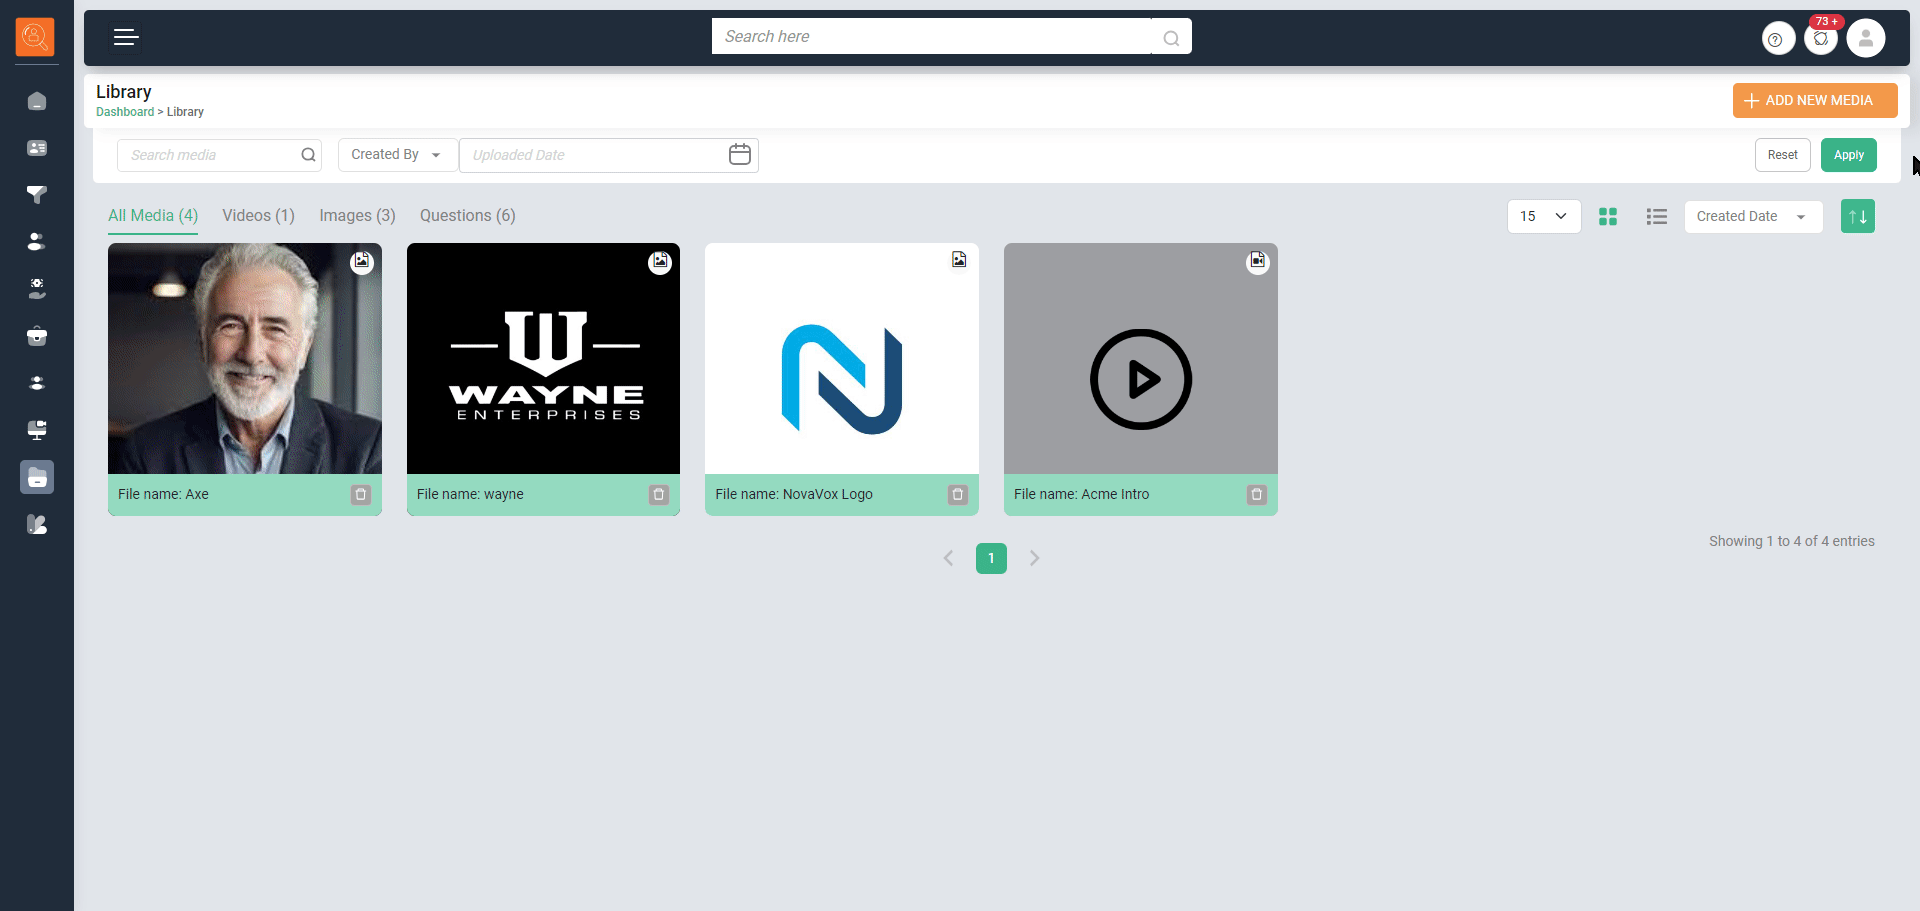
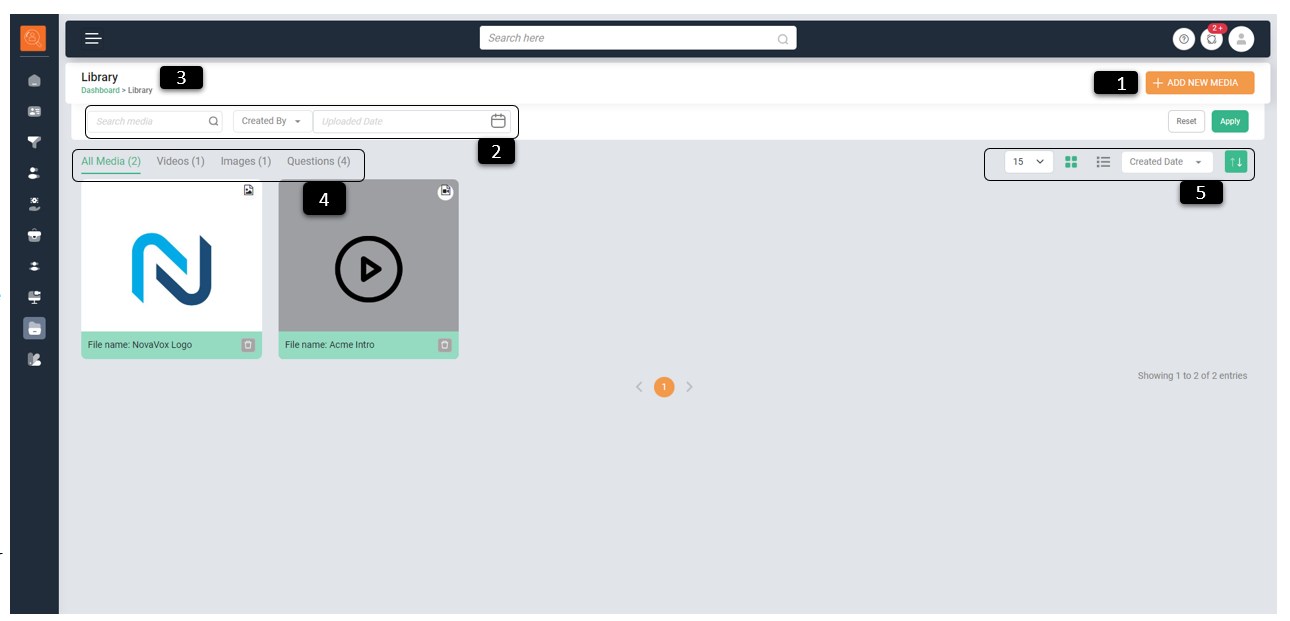
1 Add New Media - Use this feature to upload videos or images related to client organizations. These can be utilized for job postings, scheduling interviews, and building brand pages.
-
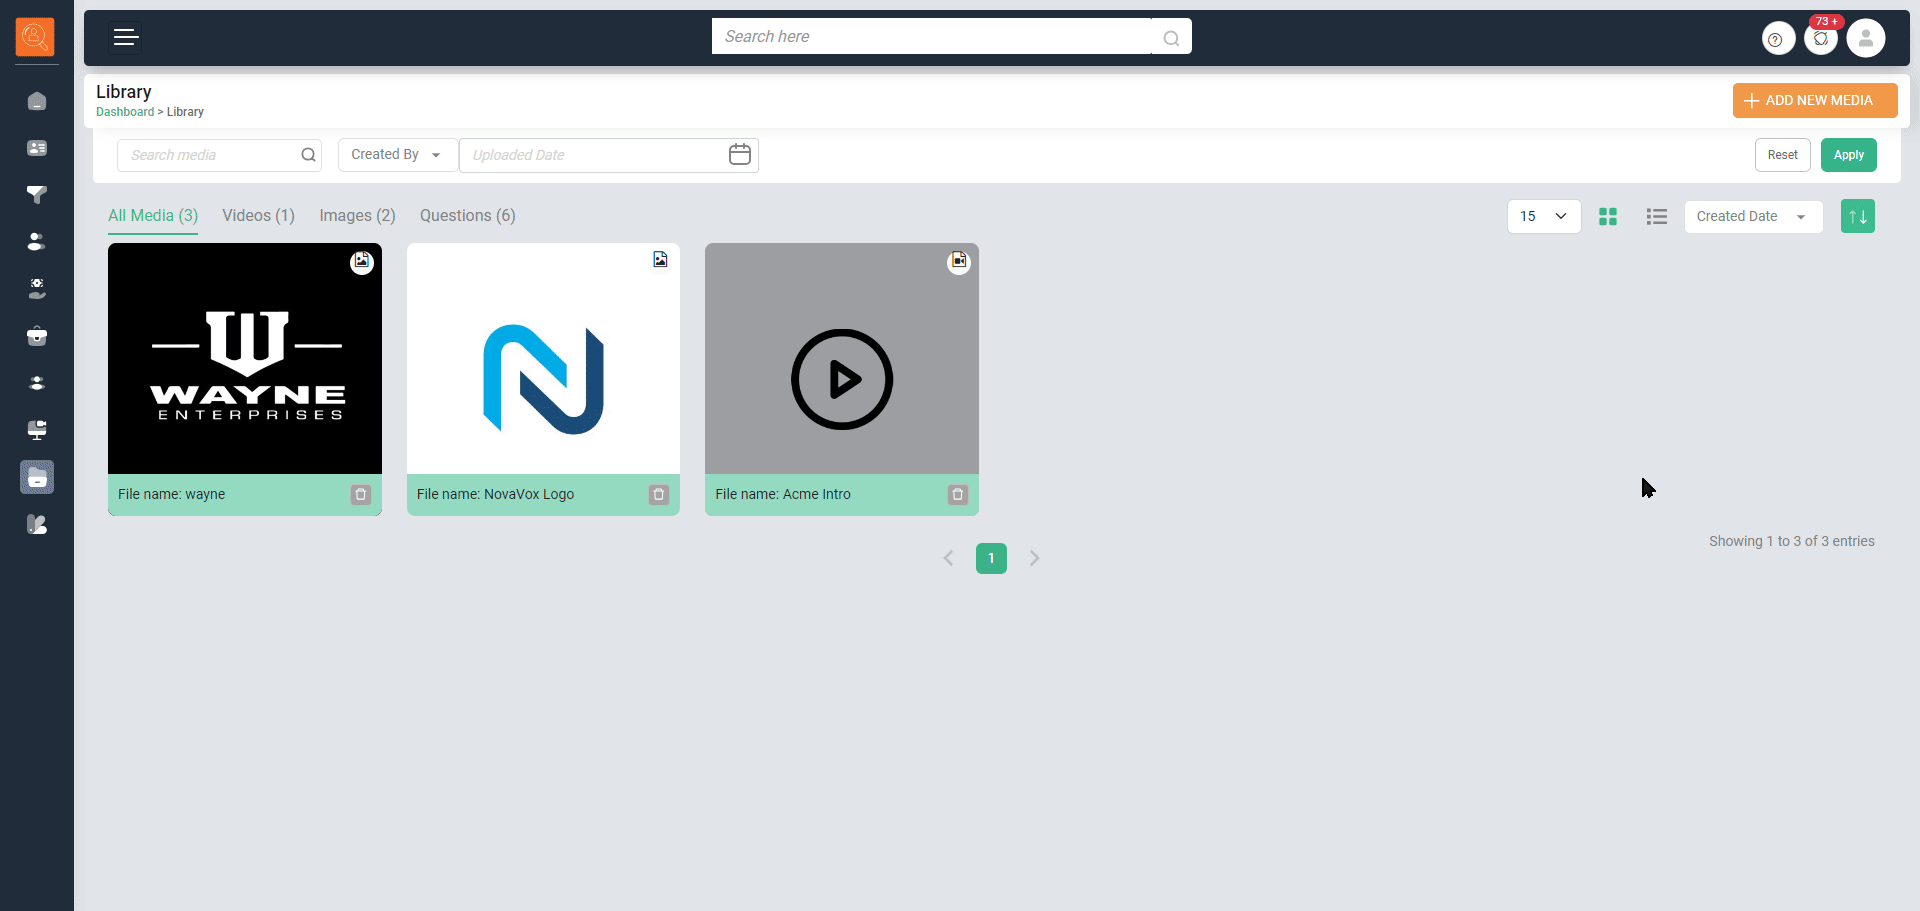
2 Filter/Search Bar - Allows you to refine page content based on parameters like “Name of File”, “Created By”, and “Date”. Use “Reset” for the default view and “Apply” to enforce the filters.
-
3 Navigation Icons - Are used for page navigation. They direct you to the highlighted page, such as the Dashboard.
-
4 Library Sub Tabs - Offer a quick view of content types: “All Media”, “Videos”, “Images”, and “Question Sets”. “Question Sets” are templates for specific job role screenings, stored in the library.
-
5 View & Sort Options - Are for customizing display preferences, like the number of items per page and their format (list or card). Items can be sorted by “Name”, “Created Date”, or “Last Modified”.
How to Add a media file?
-
1 Click on "Add New Media". It will give 2 options, click on "Upload Media"
-
2 To upload a file, a new window will appear. Select “Choose File to Upload”, enter the “File Name” and a “Description”. Finally, click on the “Add” button.
-
3 The file you’ve uploaded will be displayed in the Library.
How to Add a Question Set? *Question sets stored in the library can be utilized when setting up a structured interview for a specific job role.
-
1 To create a new question set, select “Add New Media”. Then, from the two options that appear, choose “Create Question Set”.
-
2 In the new window that opens, input the “Title/Description”, followed by a more detailed “Description”. To finalize, click the “Add” button.
-
3 For each question, you can configure:
- “Maximum Think Time”: The time allotted for a candidate to think before answering.
- “Maximum Number of Retakes”: The number of attempts a candidate can make. Set to “0” for no retakes.
- “Maximum Answer Length”: The time limit in minutes for answering each question.
-
4 You can add multiple questions to a single set. After adding all the questions, click “Save Set” to store them.
-
5 The saved question set will be visible under the “Questions Set” sub-tab in the Library page. From there, you can “Preview”, “Edit”, or “Delete” the set as needed.