-
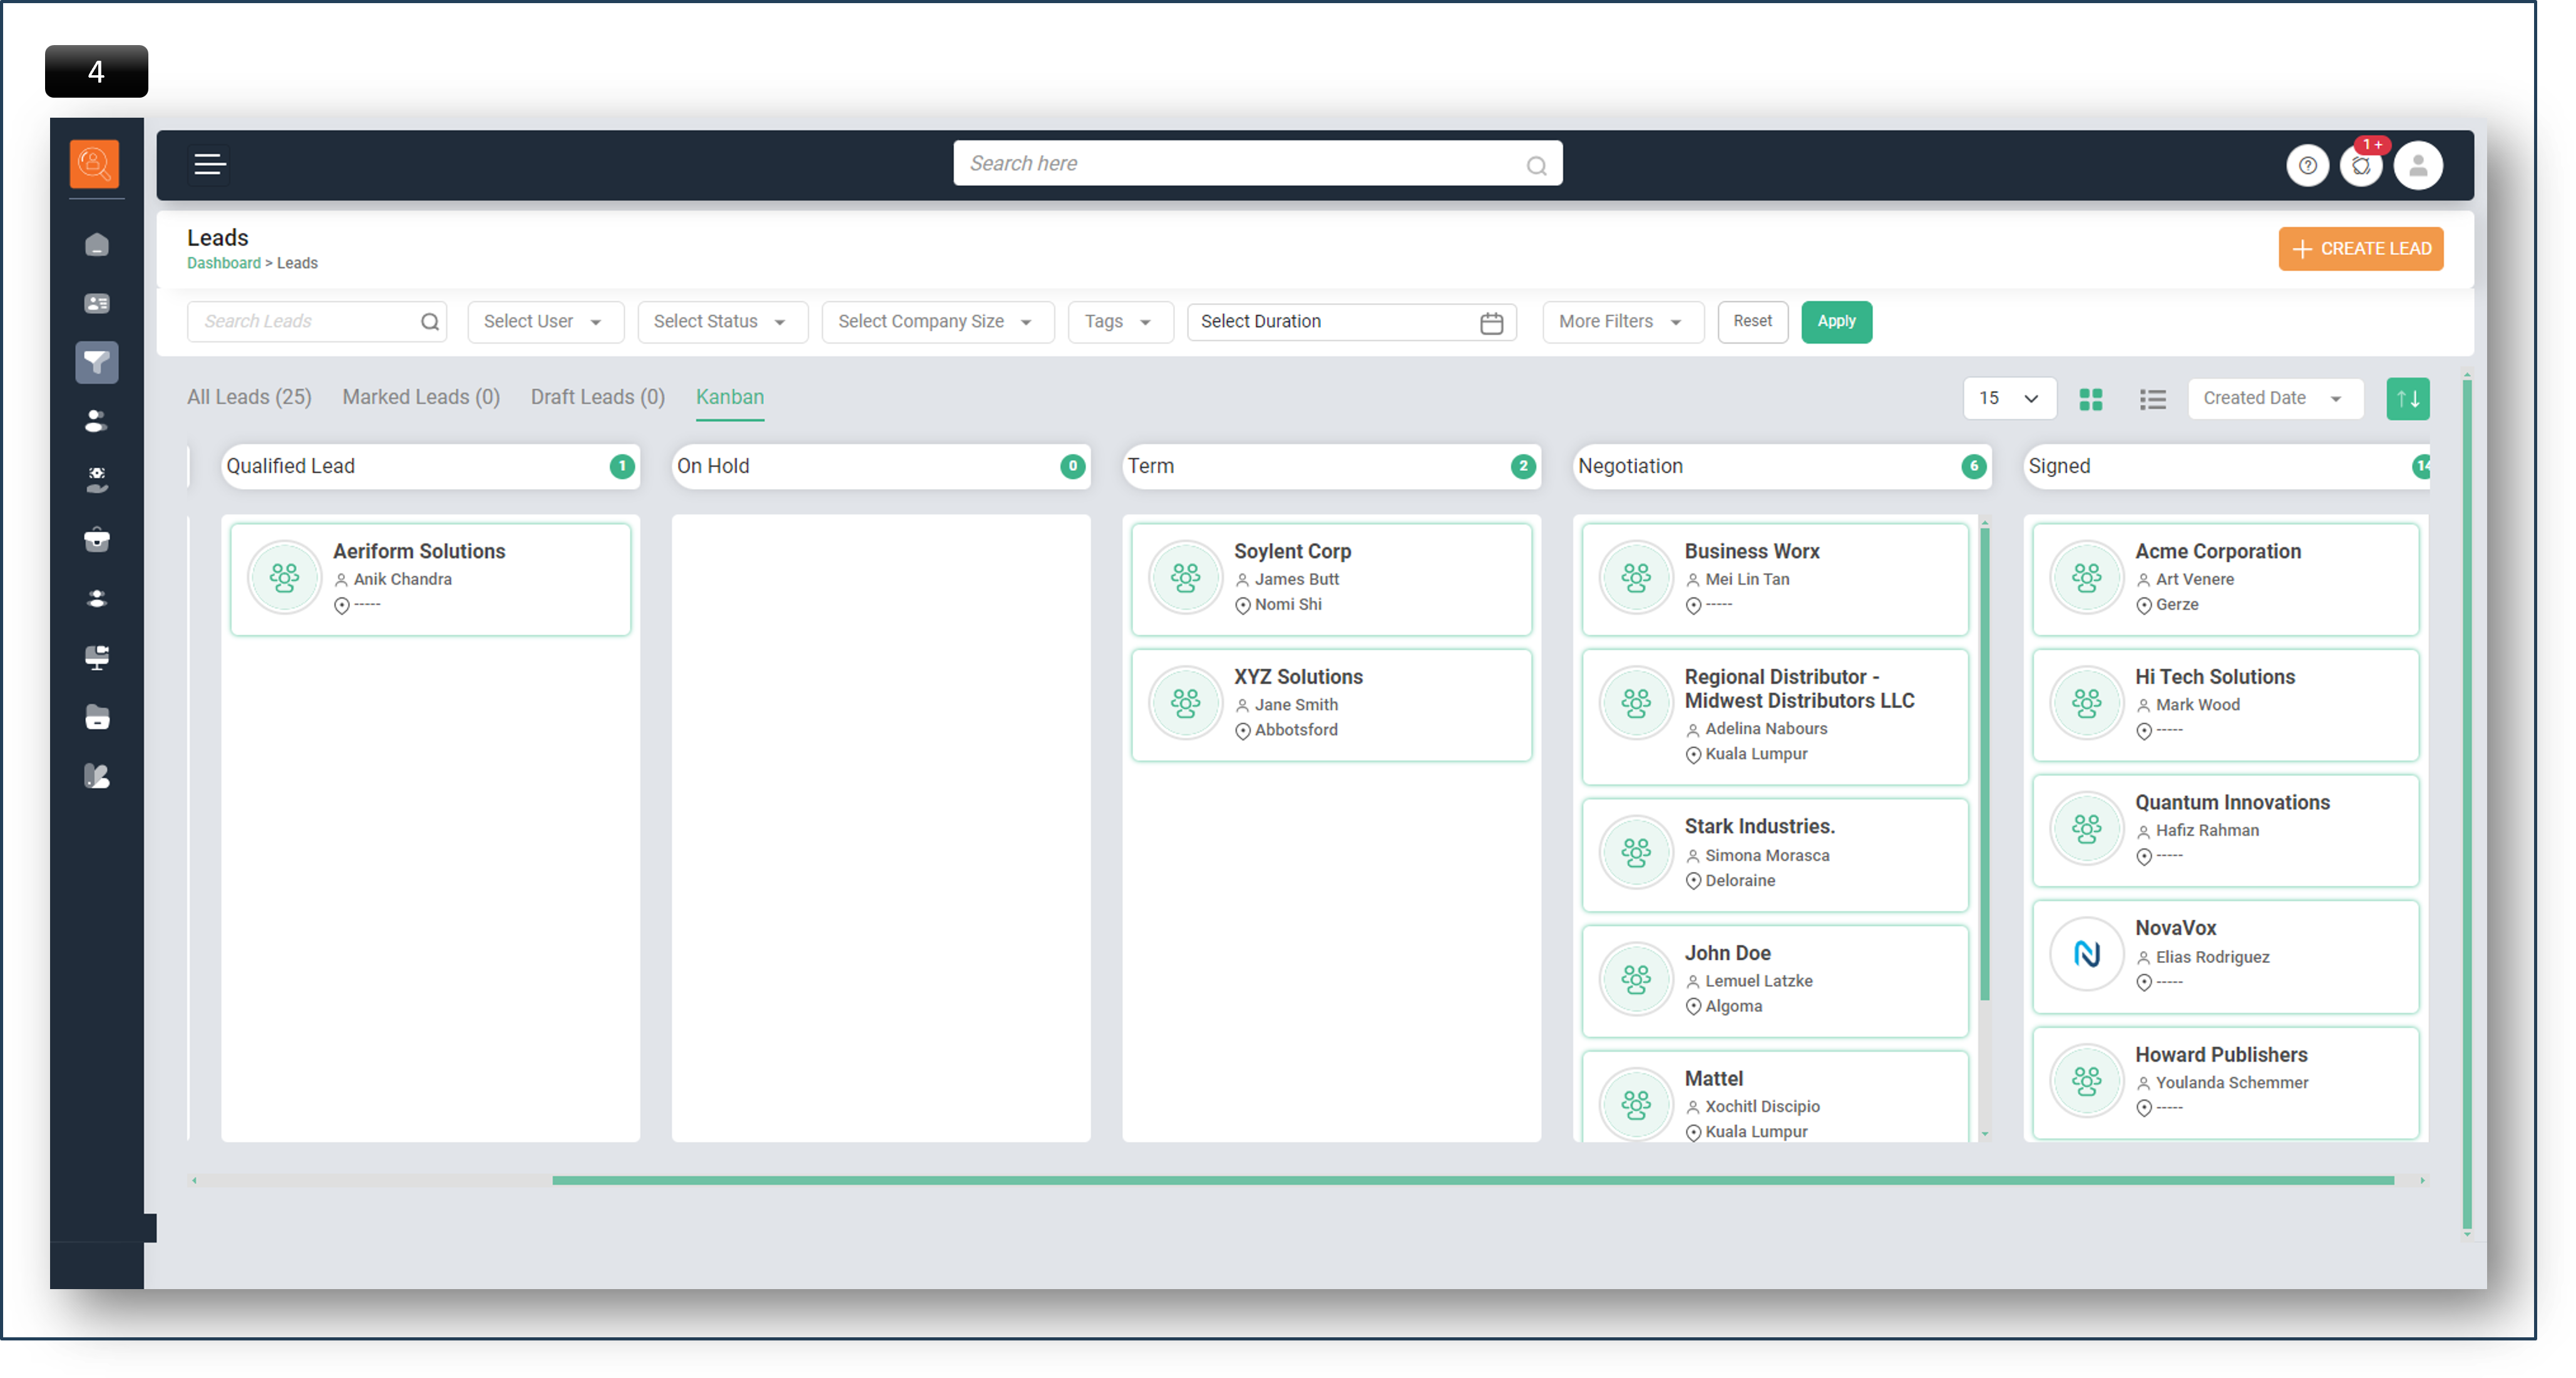
1 Create Lead - Select this option to create a new Lead.
-
2 Filter/Search Bar - Adjust page content using parameters like Lead Status, Company Size, Department, Location, Tags (it gives flexibility to sales team to filter Leads as per assigned tags),Users, Date (Weekly, Monthly, Quarterly, Yearly and Custom Date). ‘Reset’ for default view, ‘Apply’ to activate filters.”
-
3 Navigation Icons - Used for page navigation. The icon highlighted in green indicates the path of current page.
-
4 Lead Sub Tabs - Quick options for viewing ‘Marked Leads’, ‘Draft Leads’, and ‘Kanban View’ for status-based Lead sorting.”
-
5 View & Sort Options - Adjust viewing preferences like number of Leads per page and display format. Sort Leads by ‘Name’, ‘Created Date’, ‘Last Modified’, or ‘Location’.”

-
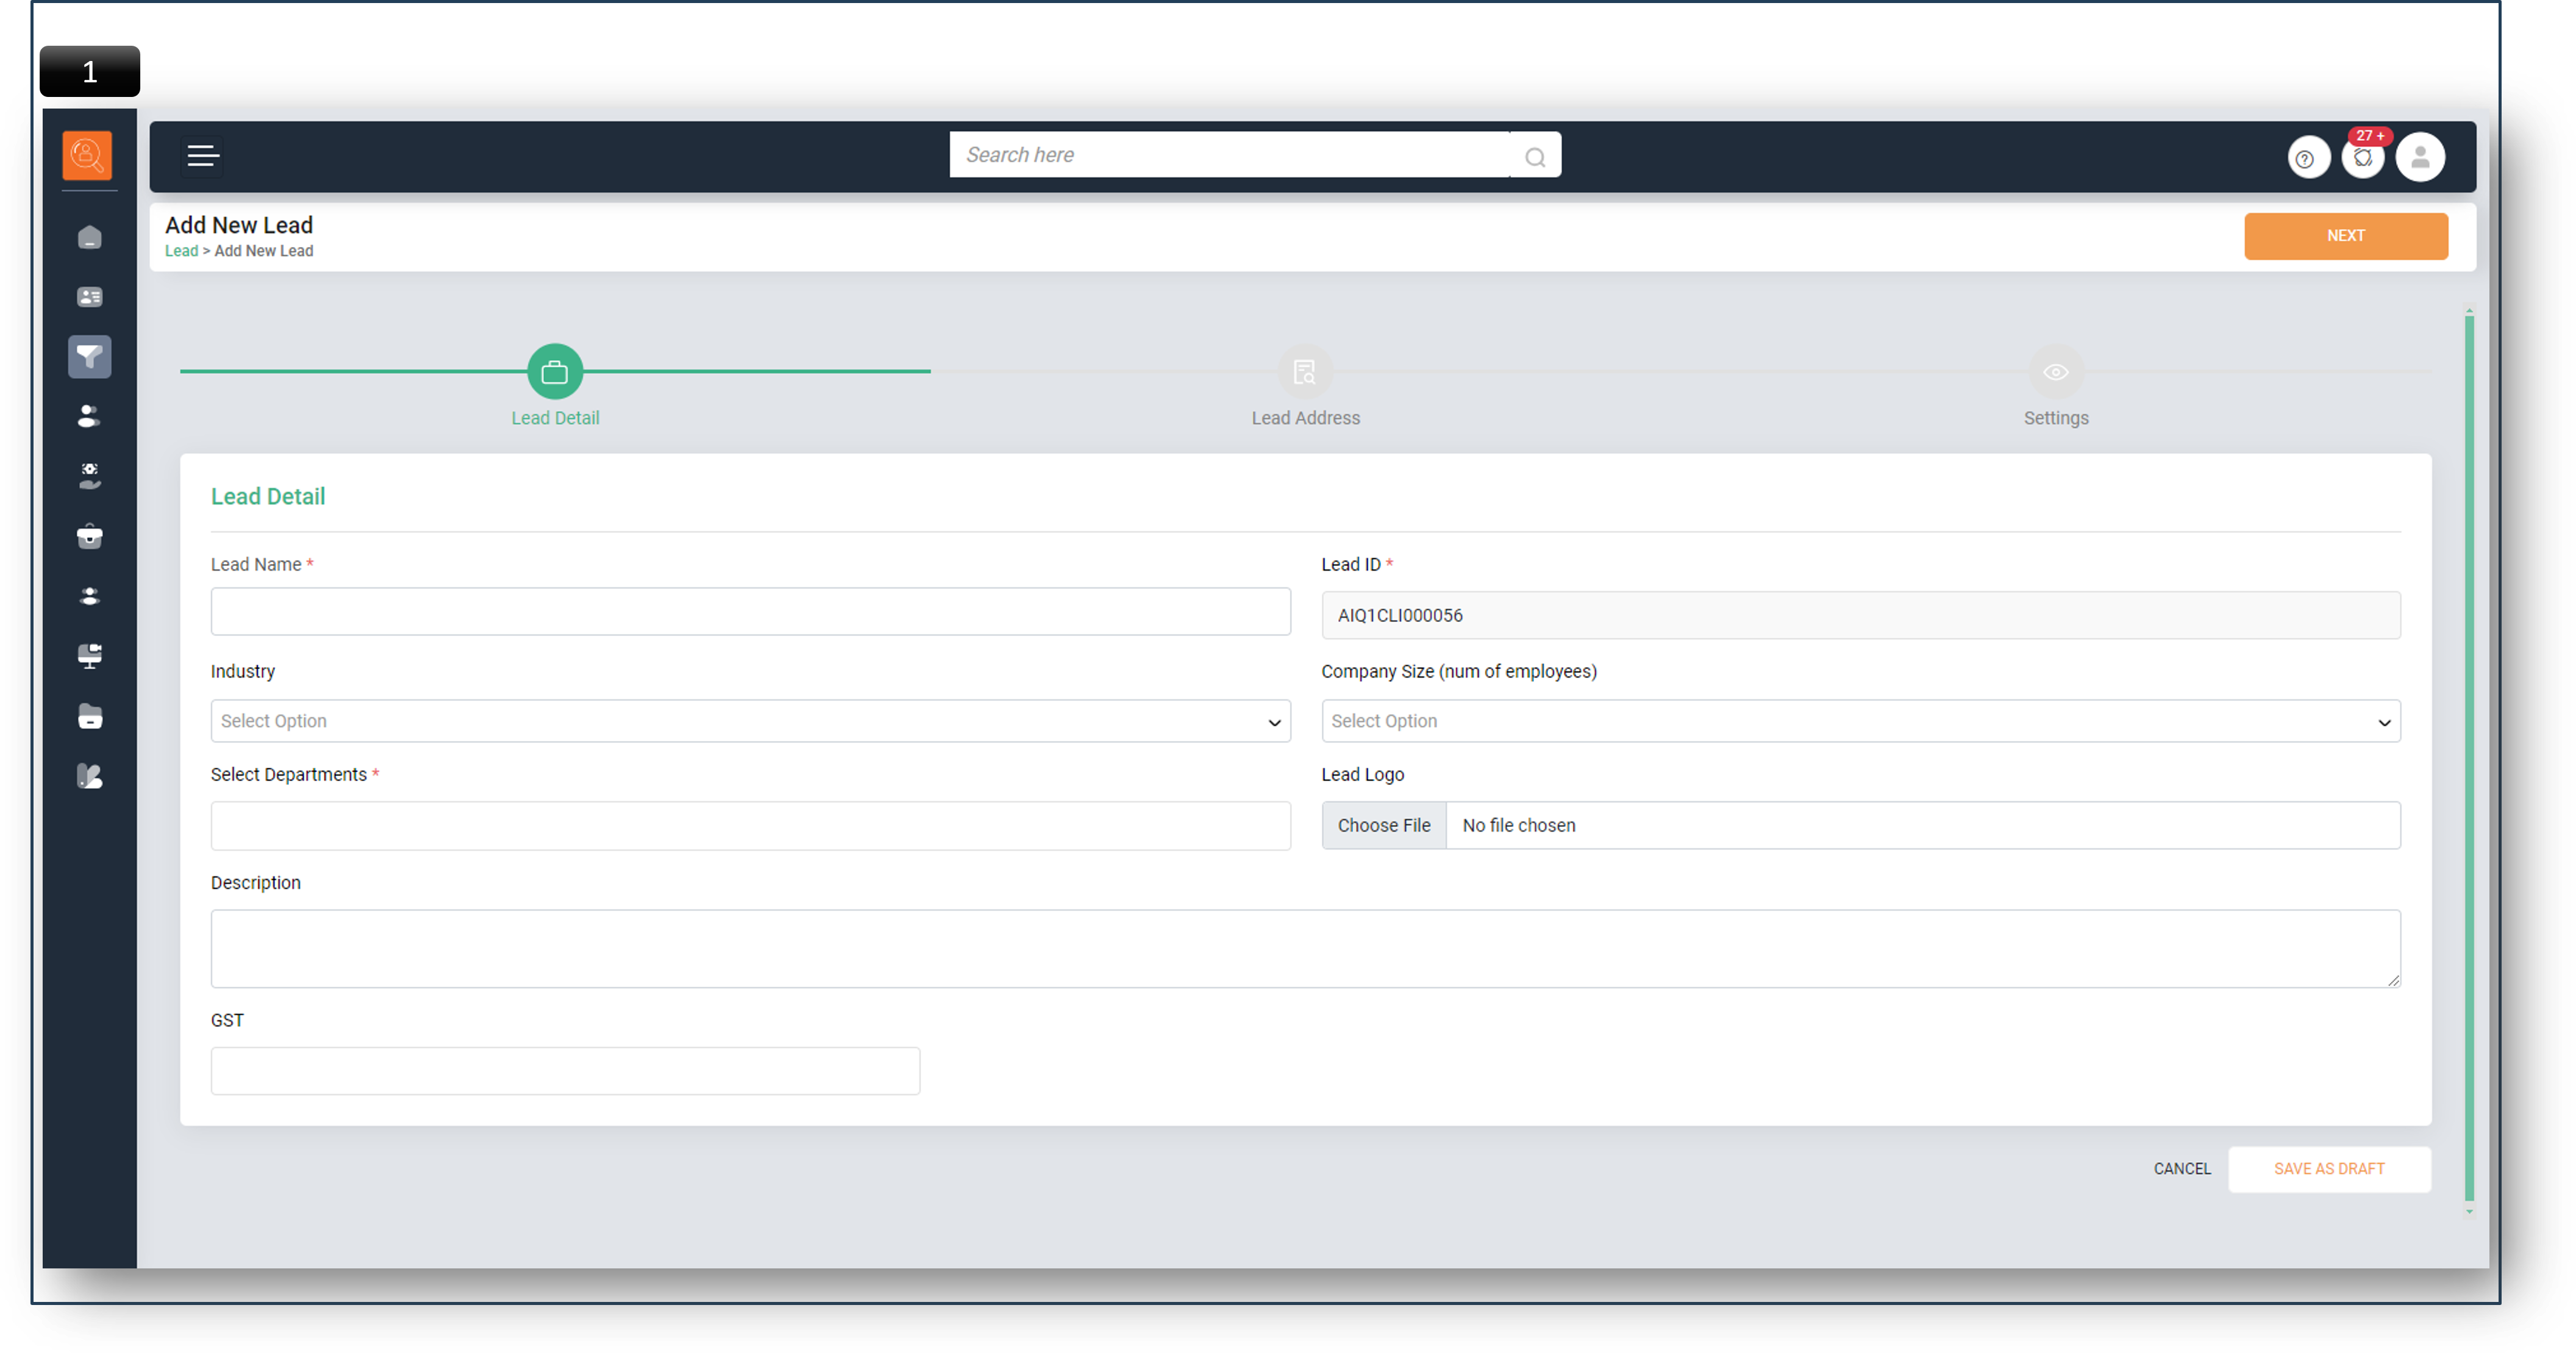
1 Upon selecting ‘Create Lead’, a new window appears. Enter Lead details like ‘Lead Name’ (typically the company name), ‘Industry’, ‘Size of Company’, ‘Departments’, ‘Lead Logo’ (company logo), ‘Description’, and ‘GST’. Click ‘Next’.
The ‘Lead ID’ is generated automatically.” -
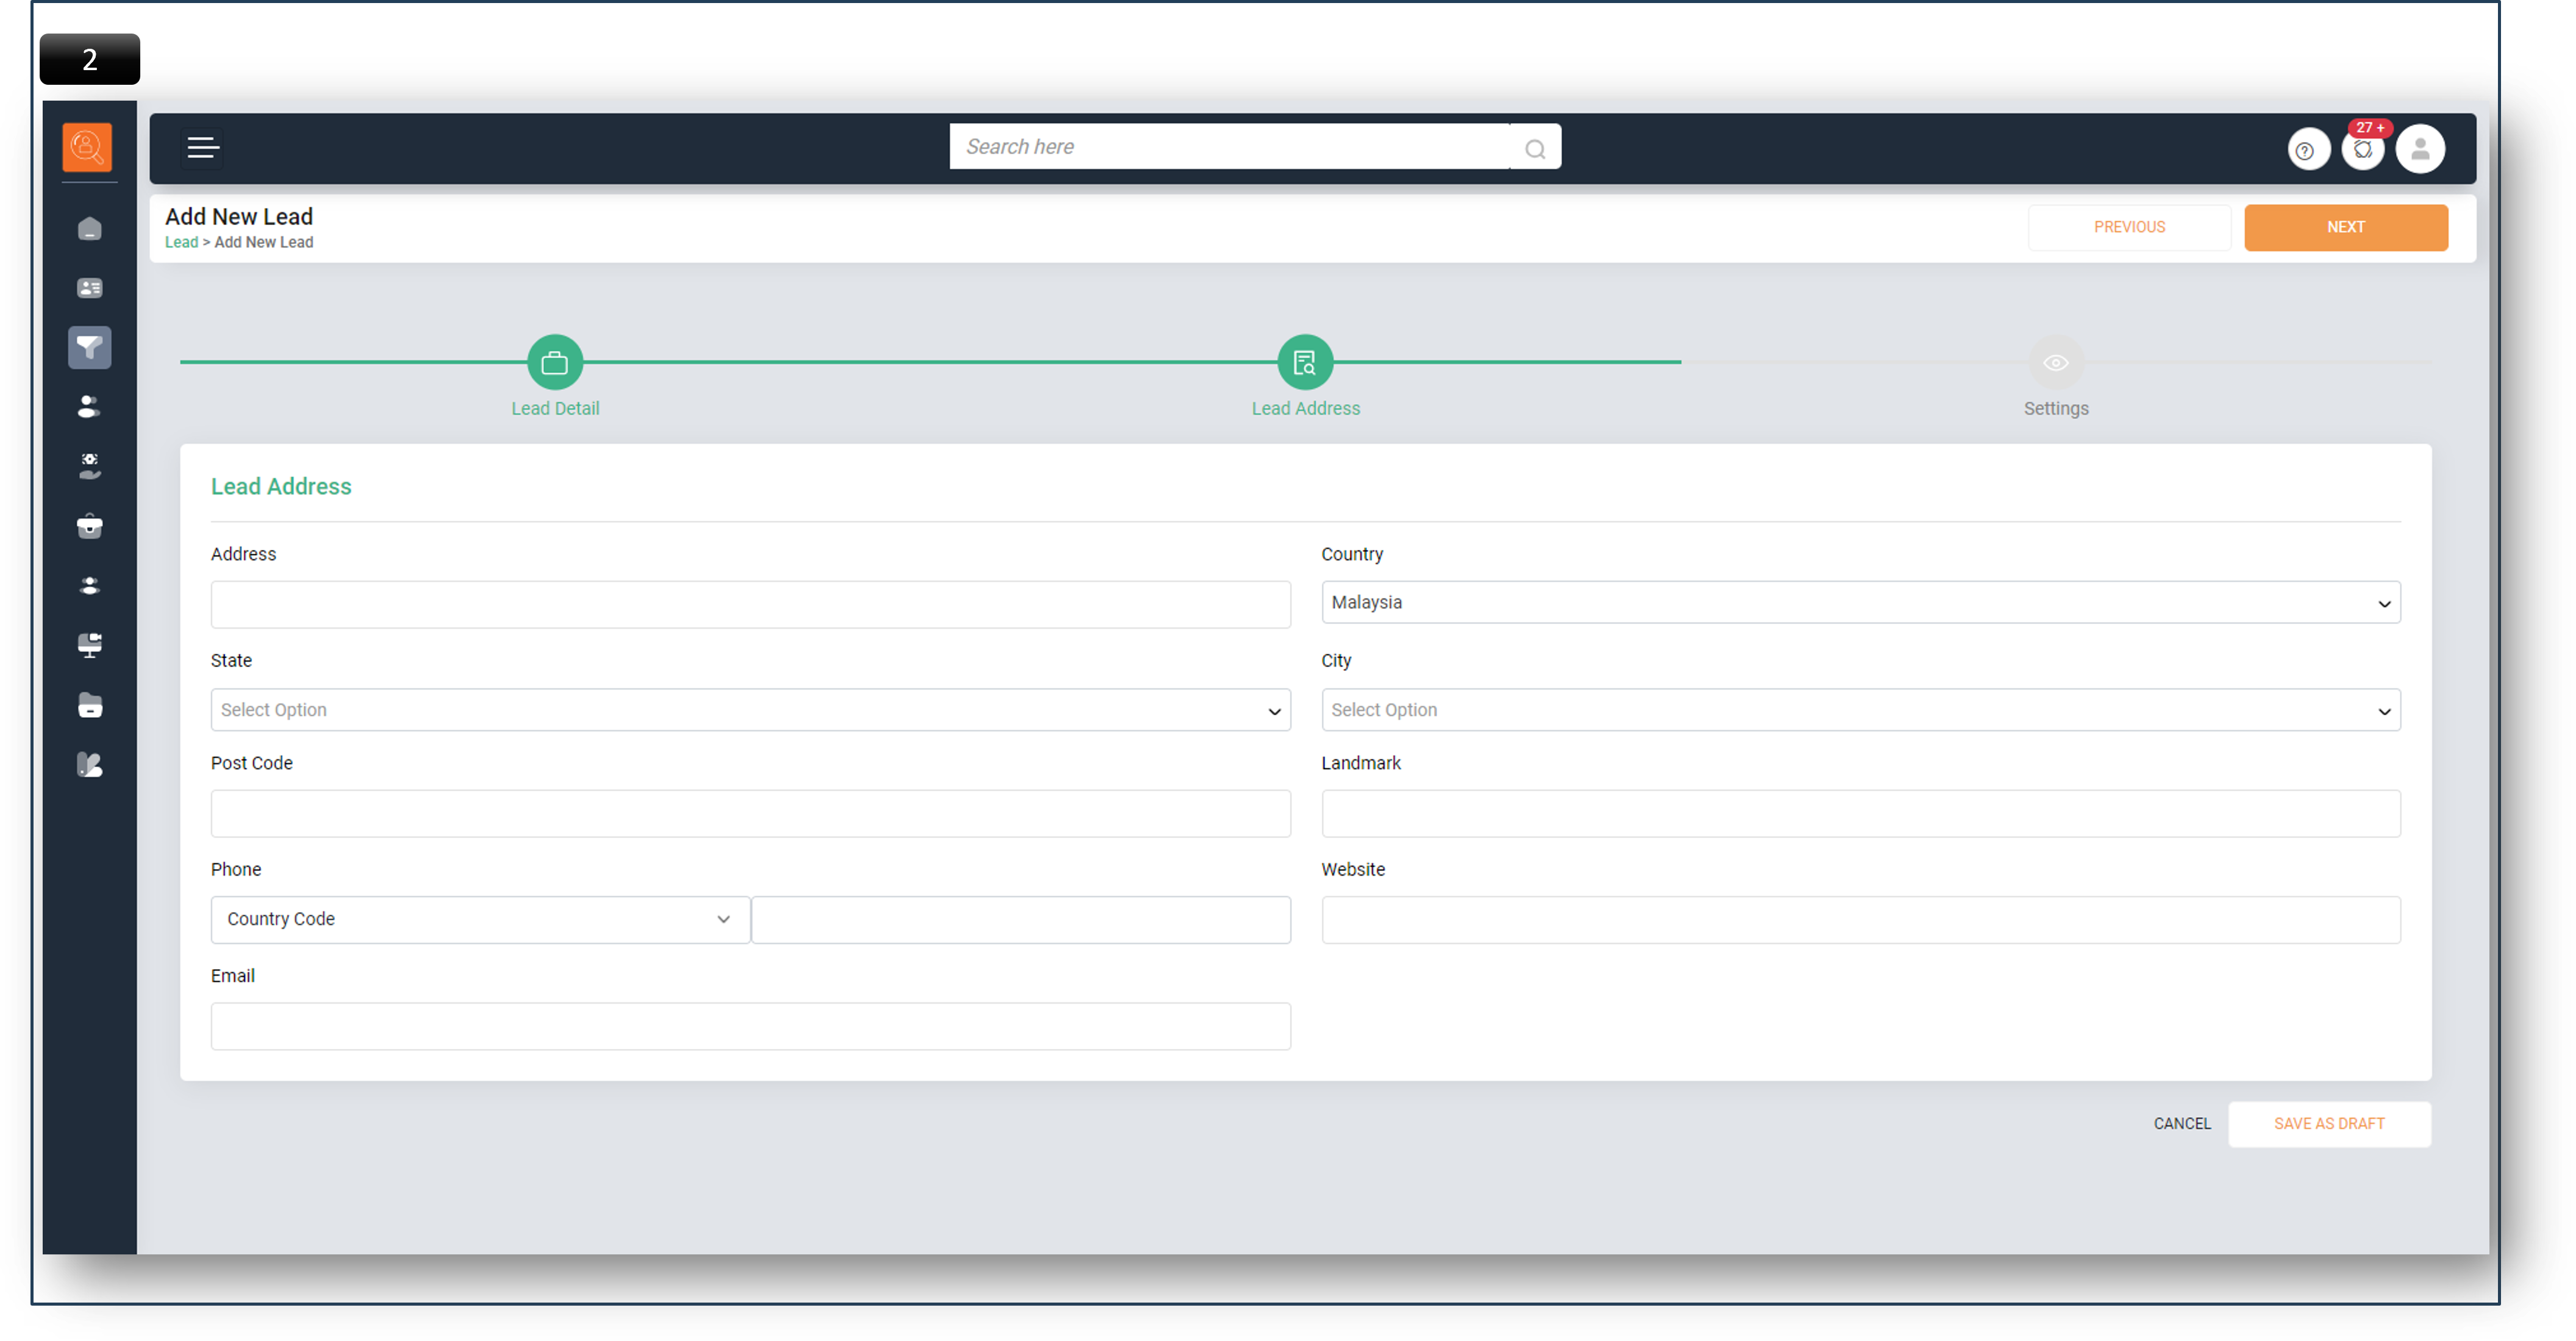
2 Enter ‘Lead Address’ details including ‘Address’, ‘Country’, ‘State’, ‘City’, ‘Post Code’, ‘Landmark’, ‘Phone’, ‘Website’, and ‘Email’.
-
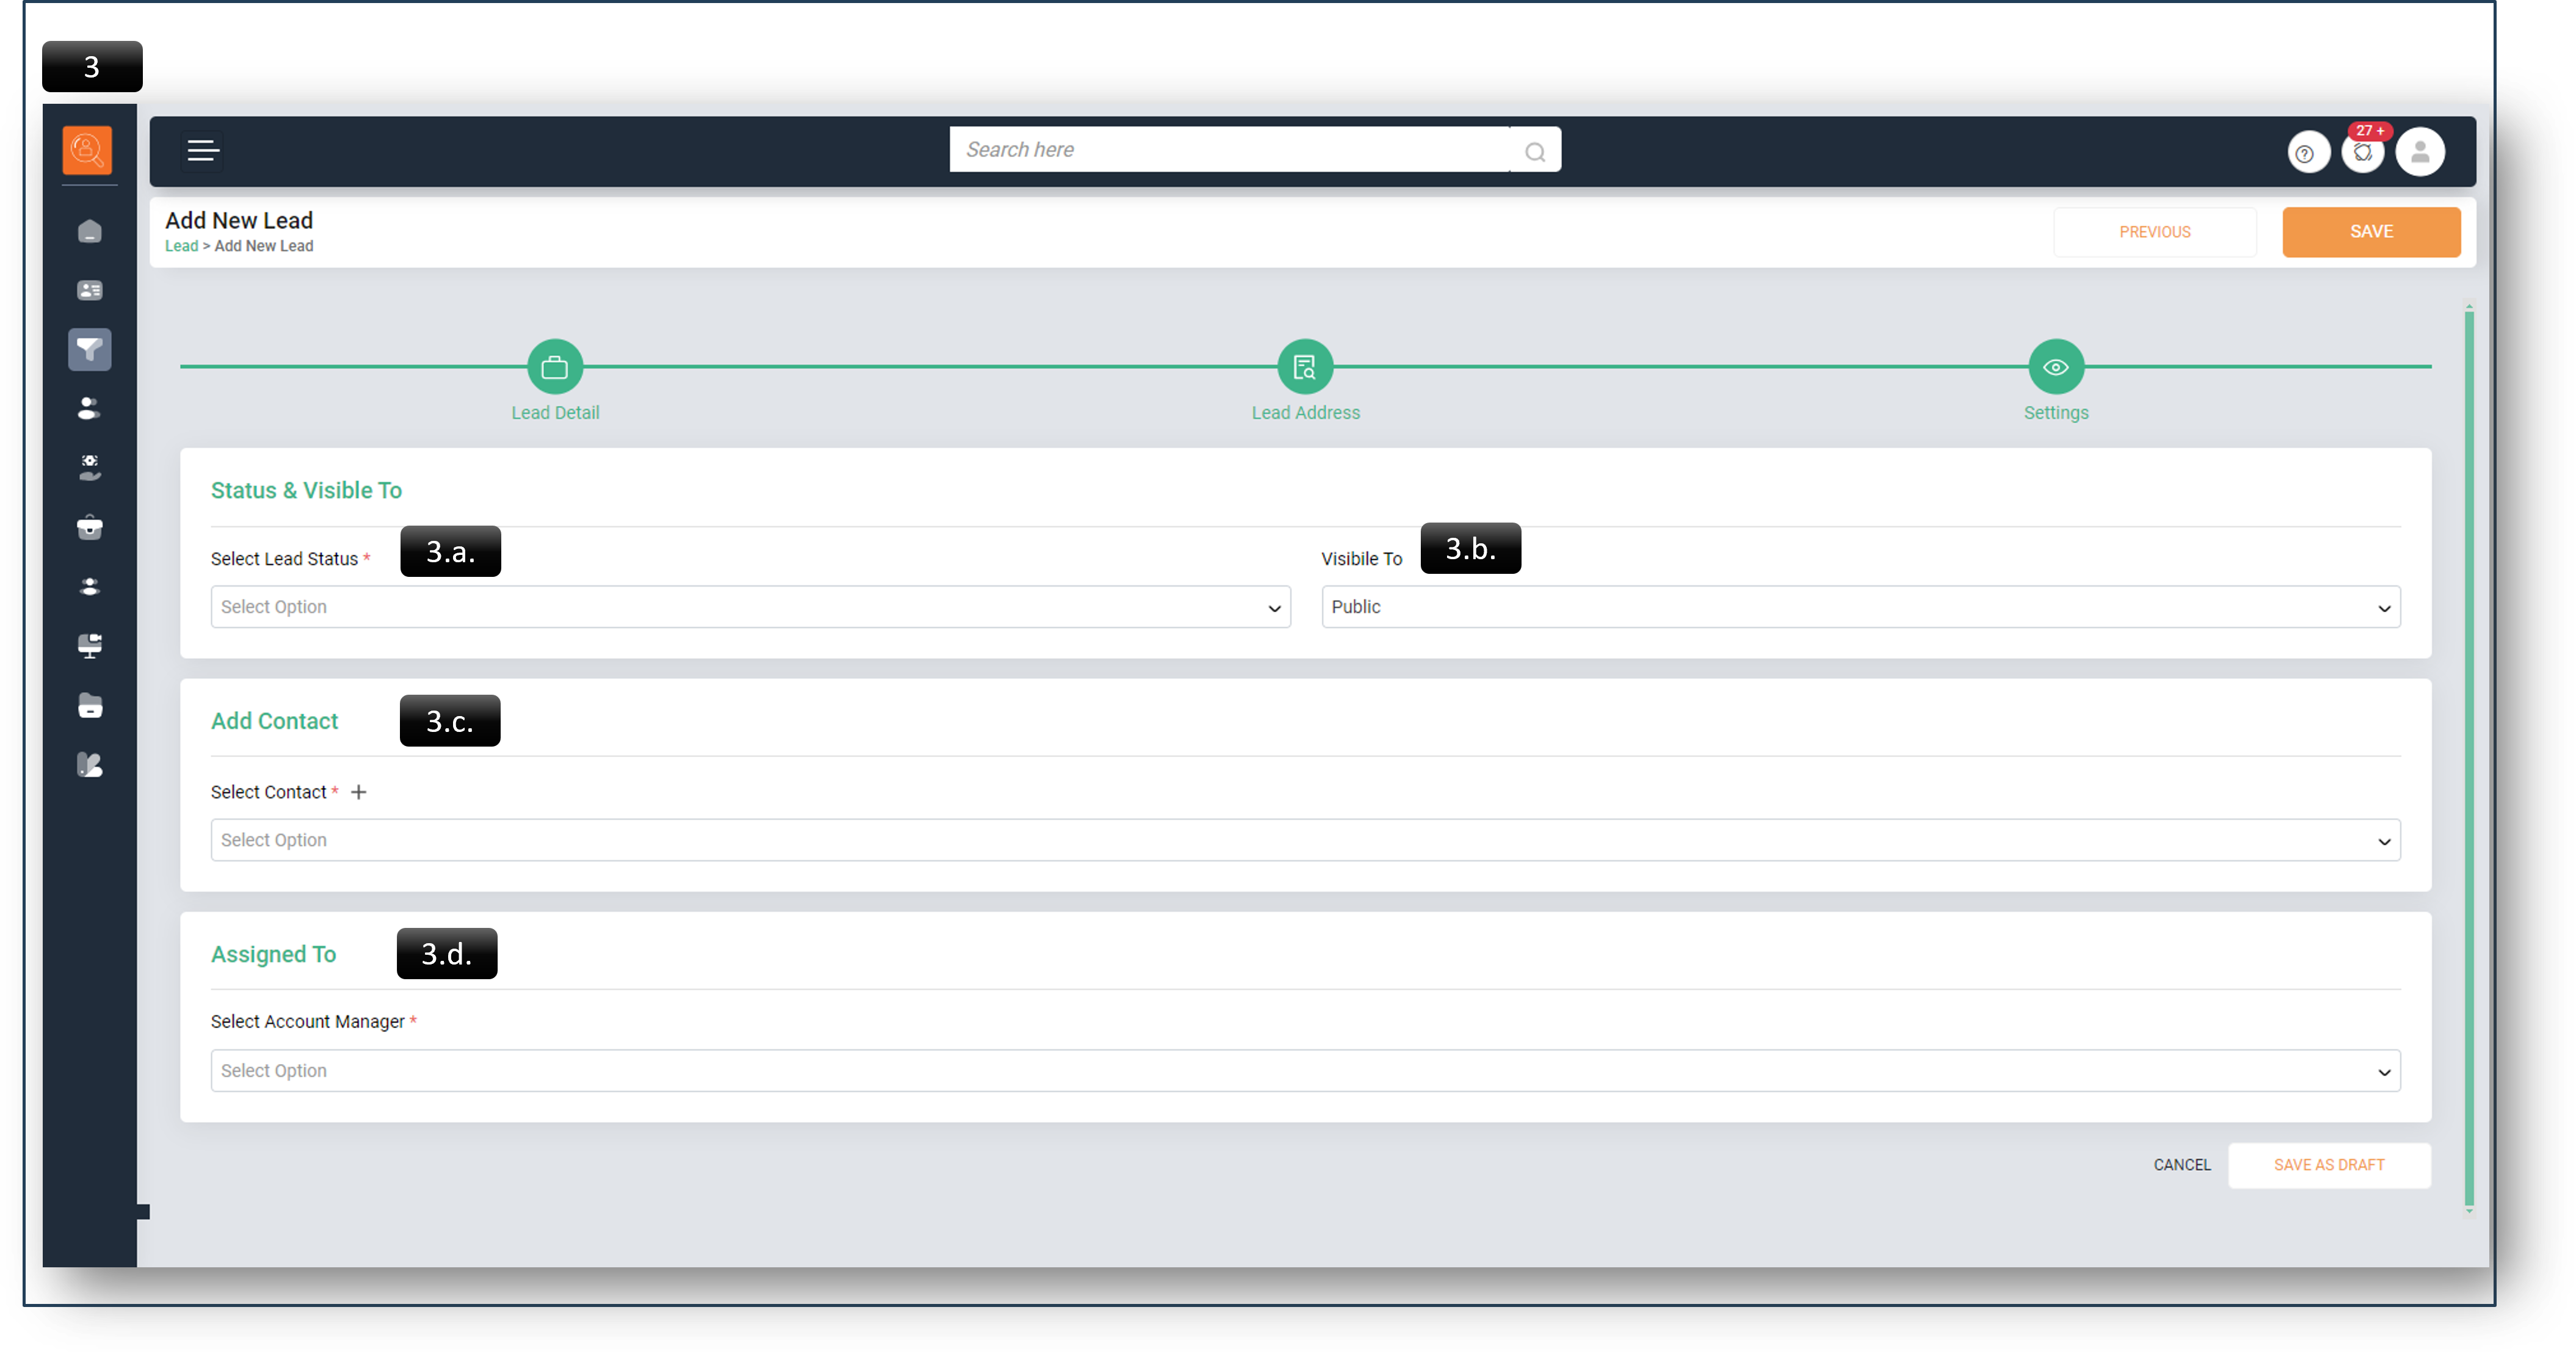
3 Finalize the lead in "Settings" by :
- Choose ‘Lead Status’ - it could be a ‘New’ lead, a ‘Qualified’ lead leading to account creation, an ‘On-hold’ lead, a lead discussing ‘Terms’, or a lead under ‘Negotiation’.”
- Set ‘Visible To’ as either ‘Public’ (Team) or ‘Private’ (only to self).
- "Add Contact" It’s essential to link a contact to the Lead, either from an existing contact or by creating a new one in this window.
- "Assigned To" The sales head can assign the lead to themselves or to another team member.
-
4 Click on "Save" button to finalize the lead creation. The new lead will then be visible in the Lead Tab.
-
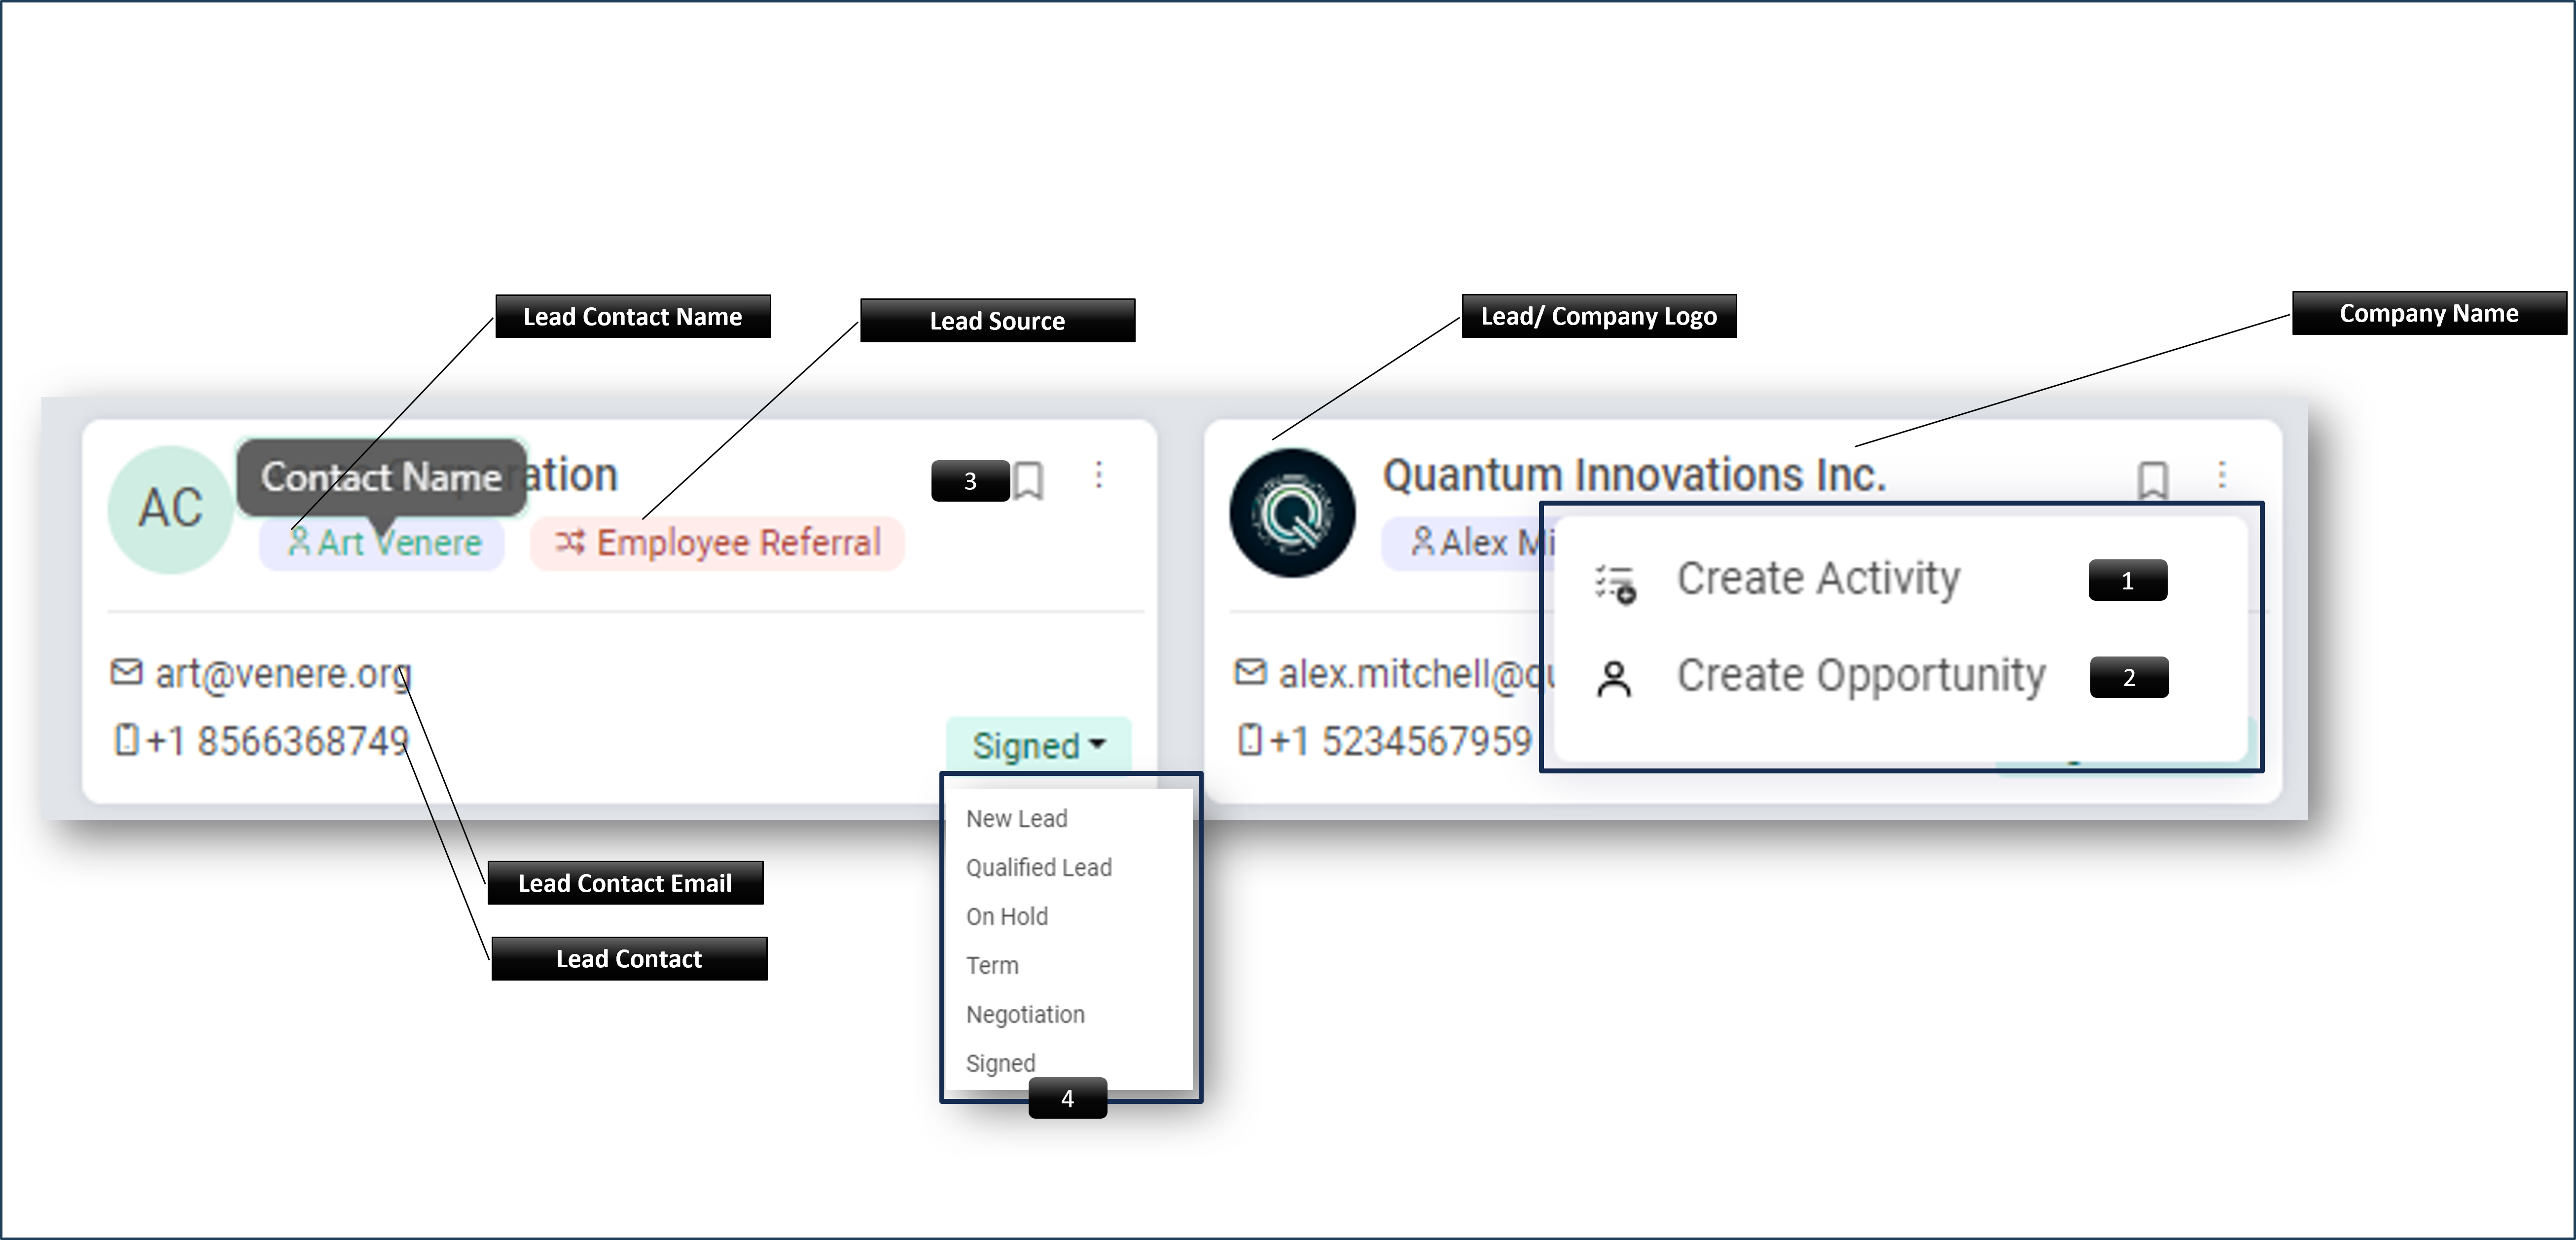
1 "Create Activity" , directly from Lead Card
-
2 "Create Opportunity" , directly from Lead Card
-
3 "Mark Lead" , directly from Lead Card for ease of view
-
4 “Adjust the ‘Status’ to ‘New’ for an initial lead, or ‘Qualified’, ‘On-hold’, or for a lead where ‘Terms’ are being negotiated, ‘Negotiation’, or ‘Signed’. A ‘Signed’ lead undergoes the necessary approvals and is subsequently converted into an Account.”
-
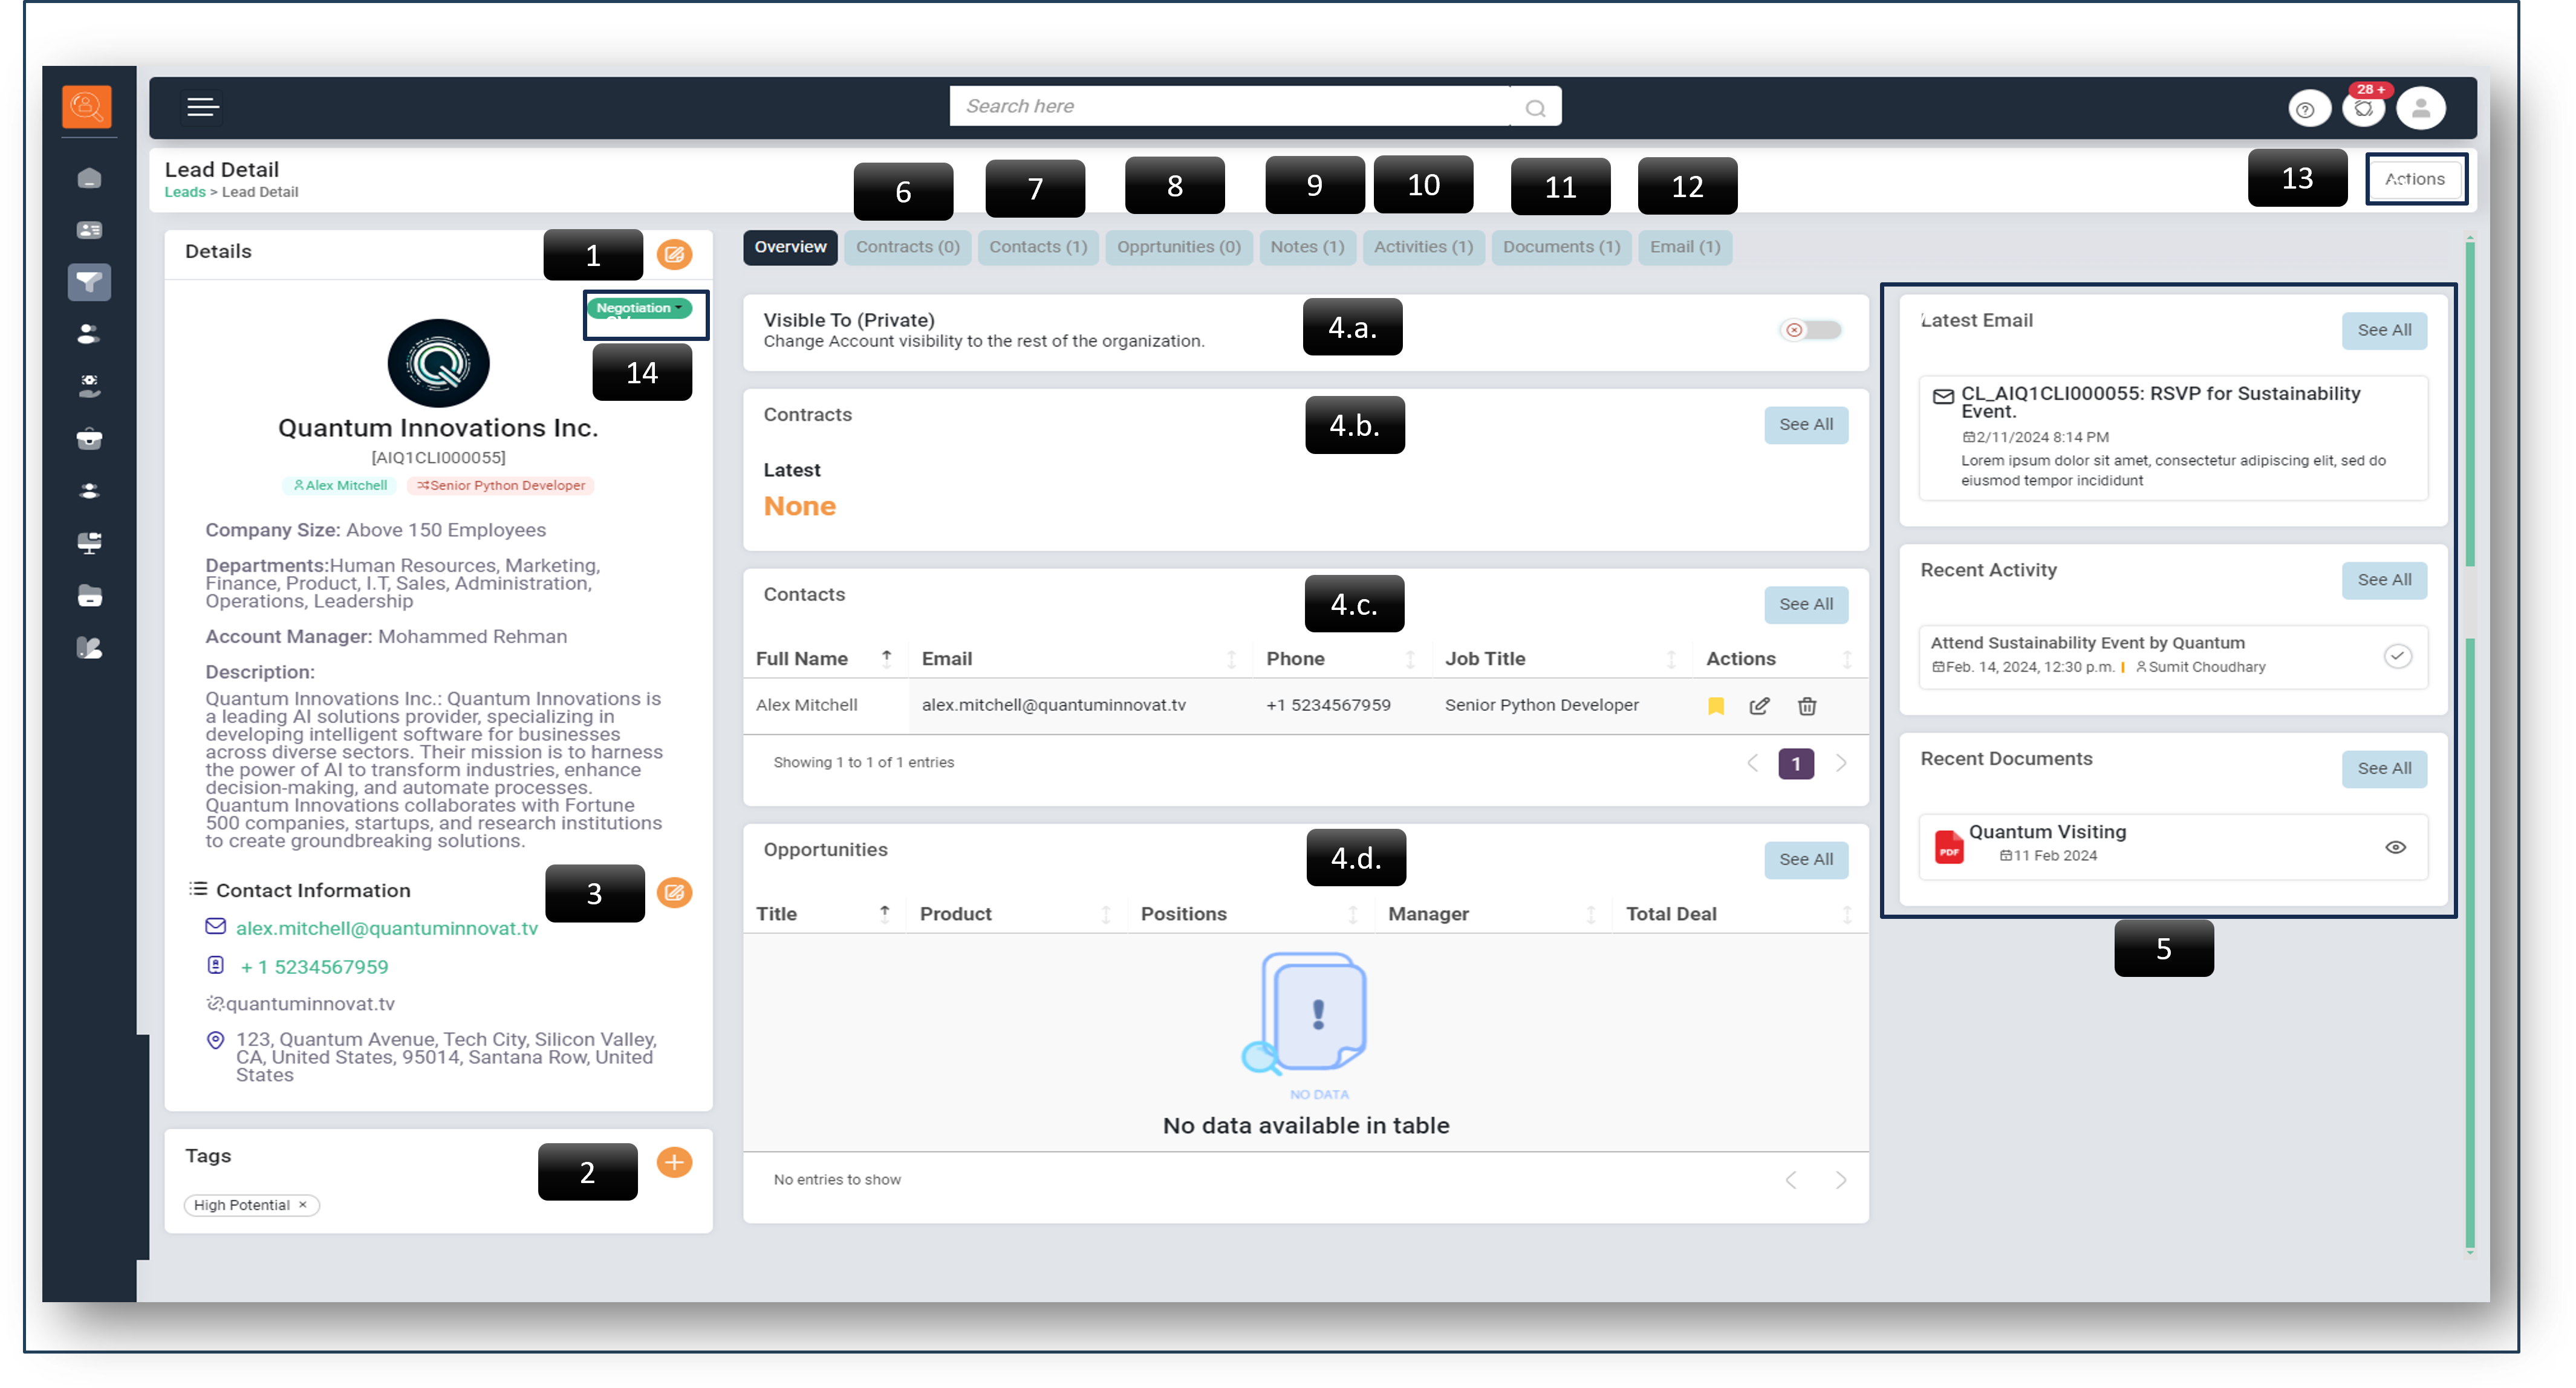
1 If necessary, you can ‘Edit Details’ after the Lead has been created.
-
2 Attach ‘Tags’ for easy searching, such as ‘High Potential’.
-
3 Modify ‘Contact Information’ as needed to update the Lead’s contact details
-
4 The ‘Overview’ tab provides a comprehensive set of information related to the Lead :
- Switch Lead visibility between ‘Public’ and ‘Private’ as per the owner’s preference.
- The ‘Contracts’ section displays any past or present contracts associated with the created Lead.
- The 'Contacts' section displays the details of the individual linked with the Lead.
- The ‘Opportunities’ section displays any previous or ongoing opportunities linked with the Lead.
-
5 The ‘Recent Activities’ bar keeps you informed about all the latest activities, such as exchanged emails and other actions.
-
6 In the ‘Contract Tab’, you can ‘Create the Contract’ for the Lead or ‘Approve the Contract’, depending on your role.
-
7 “The ‘Contact Tab’ provides client contact details with options to ‘Edit’ or ‘Delete’ as needed.
-
8 The ‘Opportunities Tab’ shows past or present opportunities linked with the Lead.
-
9 Include ‘Notes’ about the contact, detailing specific requirements or potential future prospects.
-
10 Utilize the ‘Create New Activity’ feature to delegate tasks such as ‘Call’, ‘Meeting’, and so on, directly from TALXrecruit to yourself or your team members.
-
11 Use the ‘Documents’ feature to upload documents related to the relevant lead or to view documents that have already been added to the system.
-
12 Communicate with contacts directly through the ‘Email’ feature in TALXrecruit, eliminating the need to juggle multiple applications.
-
13 Initiate an Opportunity directly from this page by selecting the ‘Actions’ button.
-
14 Alter the ‘Status’ to ‘New’ for a fresh lead, or ‘Qualified’, ‘On-hold’, or for a lead where ‘Terms’ are under discussion, ‘Negotiation’, or ‘Signed’. A ‘Signed’ lead undergoes the necessary approvals and is then converted into an Account.